Fieldfare is built to get you from signup to first invoice in minutes. No lengthy setup wizard, no features you need to wade through. This guide walks through the whole process.
Sign up
Head to Fieldfare and enter your email. We use magic link authentication, so there's no password to create or remember. Click the link in your inbox and you're in. If you've used Notion or Slack's magic link login, it's the same idea.
Set up your profile
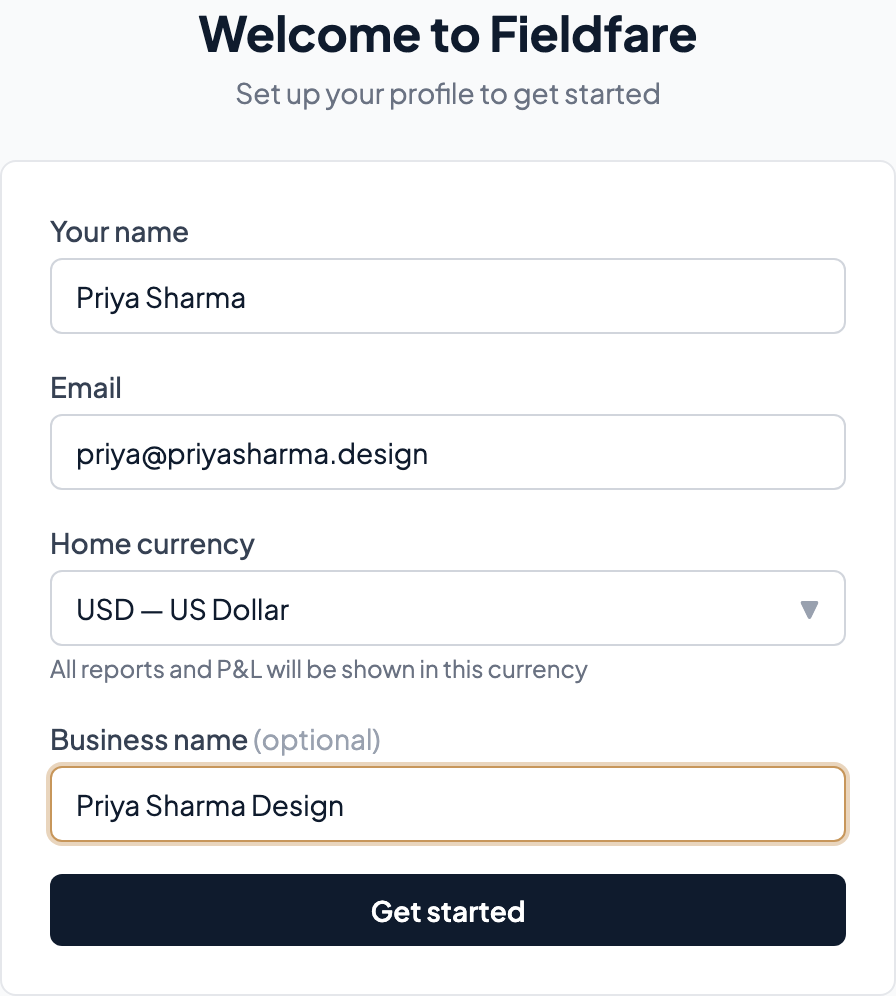
The first thing you see after signing in is the profile setup screen. Most of it is straightforward — your name, business name, address — but one field deserves attention.
Home currency is the most important choice you'll make in Fieldfare. This is your reporting currency: the currency you pay your bills and taxes in. Every number in your P&L, every expense total, every dashboard figure converts to this. For most Indian freelancers, that's INR. For European freelancers, EUR. For someone in the Philippines, PHP.
Choose carefully: you can't change this later. Changing it would mean recalculating every historical transaction, exchange rate conversion, and FX gain/loss, so we lock it in at setup.
Shortcut: upload an existing invoice
If you already have a recent invoice as a PDF, you can upload it during onboarding and we'll pre-fill the profile fields — business name, address, tax ID, bank details — by reading the file. Review everything before saving; extraction is good but not perfect. If you don't have an invoice handy, skip it and fill the form out manually.
Logo upload
Upload a logo in the same step (or later from Settings). PNG or JPG, under 2MB. Your logo appears on every PDF invoice you send, on any template. Leave it blank and the invoice just shows your business name.
Add your first client
Go to Clients and click New client. The key field is currency: this is what you'll invoice them in. If TechCorp pays you in USD, set their currency to USD. If London Publishing pays in GBP, set GBP. Every invoice you create for this client will automatically use their currency.
Set payment terms too. Net 30 is standard for most freelance work, but some clients expect Net 15 or Net 60. The due date on every invoice calculates automatically from these terms.
If you have a PDF invoice from this client already, you can upload it on the new-client screen and Fieldfare will extract their name, address, and contact details. Same flow as onboarding.
For the full details, see the Clients documentation.
Create your first invoice
Go to Invoices and click New invoice. Select the client you just added and the currency fills in automatically. Add your line items: each one is a description and an amount. No complicated per-hour or per-unit setup unless you want it.
Preview the PDF to make sure it looks right, then send it off. Fieldfare has six invoice templates to choose from; pick the one that matches your brand.
What to do next
You've got the basics. Here's what to explore:
- Import your expenses — Upload a CSV from your bank. Map the columns once, and every future import from that bank is one click.
- Configure your payment providers — Tell Fieldfare what Wise, PayPal, or Payoneer charges you, so it can estimate fees on every payment.
- Check your Dashboard — Your headline numbers at a glance: revenue, expenses, net profit, and a side-by-side provider comparison.
- Review your P&L — This is where it all comes together. Income by client, expenses by category, FX impact, and the net profit number your accountant needs.